didBox is
- didBox (or didBOX) is a driver identification / access control system for industrial vehicles (especially forklifts, mobile plant, etc.).
- It is designed to restrict use of machinery to authorised drivers only, and to record who was using a vehicle and when.
- The system was originally developed in the UK; in 2009
Control Box (Vehicle Unit) Installed on each vehicle (forklift, etc.), connects to power and to the reader module.
The box handles reading the Dallas keyfob/RFID, allowing or denying start, logging events.
Reader / Key-reader interface Typically a proximity or touch reader near the ignition, where the driver presents a Dallas keyfob or token.
Driver Dallas Keyfobs / Tokens Each authorised operator is assigned one or more tokens (keyfobs) that encode their ID or access category.
Wand / Programming Reader (PC Interface) A reader device and software used on a PC to program keyfobs, download stored logs from the vehicle units, and manage configuration.
Collision / Impact Sensor (Optional Module) Some versions include a 3-axis programmable sensor to detect collisions, impacts, or “shock events” on the vehicle.
Software / Data Export The system stores logs of operations (driver ID, timestamps, failed login attempts, etc.) which can be exported (e.g. spreadsheets) for review.
Typical Flow / Use Case:
A fleet manager registers vehicles and authorised drivers in a system. They program each driver’s Dallas keyfob with access credentials (which vehicles or classes they’re allowed to run).
The keyfob is presented to the reader on the vehicle. If the credential matches, the system unlocks or permits operation (e.g. enables ignition or control systems).
The system logs the event: which driver, which vehicle, date & time, and whether the login was successful or rejected.
If a driver without a valid token attempts to operate, that is logged as a failed attempt.
Optionally, if collision sensors are present, any shocks or impacts are also stored or flagged.
Periodically, a manager uses the wand reader to extract data from each vehicle. The data converts into spreadsheets for review, oversight, auditing, and health & safety compliance
Brief Benefits
Access Control & Safety: Only trained or approved individuals can operate vehicles, reducing risk of accidents or misuse.
Accountability: Because every use is logged, operators know there is traceability, which tends to promote more careful behaviour.
Data for Maintenance / Usage Insights: The usage logs (hours, attempts, etc.) allow more data-driven maintenance scheduling, fleet optimization, and replacement decisions.
Cost-effective / Low Overhead: The system is marketed as being simple to install, low cost, and not requiring expensive software or licensing
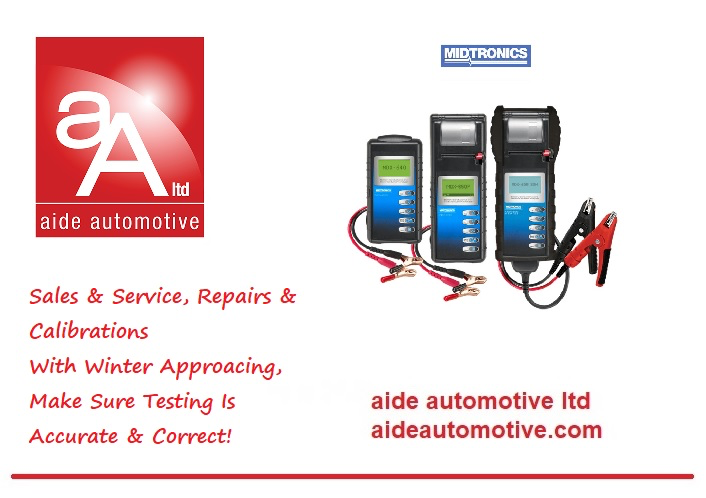
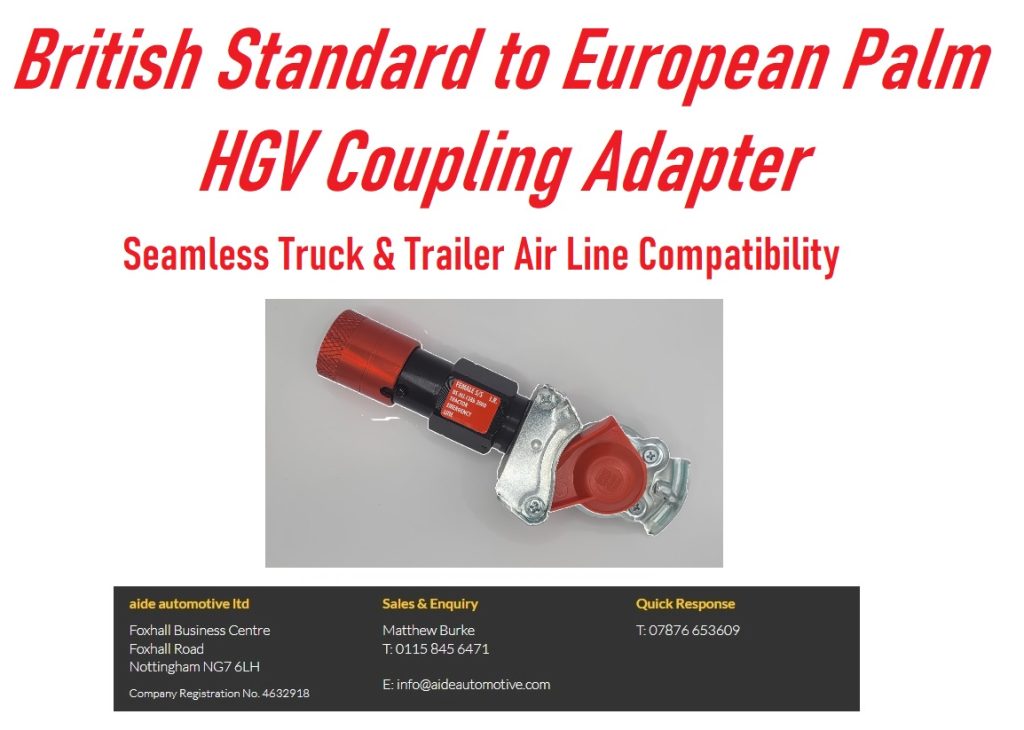
Please feel free to reach out to aide automotive at 0115 8456471 or send an email to info@aideautomotive.com for all of your automotive needs. We are proud to offer a comprehensive range of high-quality automotive products to cater to various requirements. Whether you are in the market for HGV Brake Testers, Trailer EBS Testers, or HGV Truck Trailer EBS/ABS Sensor Testers, we have you covered. Our Truck/Trailer Diagnostic Tools are designed to provide accurate and reliable diagnostics for efficient troubleshooting. Additionally, our Midtronics Battery Testers ensure that your batteries are in optimal condition for peak performance. To safeguard against fuel theft, our Anti Siphon Devices offer an effective solution. We also provide ISOCheck for monitoring ISO sockets, Trailer Locks for enhanced security, and Auto Braking Reversing Systems for improved safety. For HGV Diesel Tank Alarms and HGV Siphons, we have the right products to meet your needs. Finally, our Truck Susie Coil Covers protect your coils from damage, ensuring a longer lifespan. Contact us today to explore our wide range of automotive products and experience the quality and reliability that aide automotive is known for – Here – https://buff.ly/3kg1xoF But if in doubt or you have questions send a message and will be straight back to you !
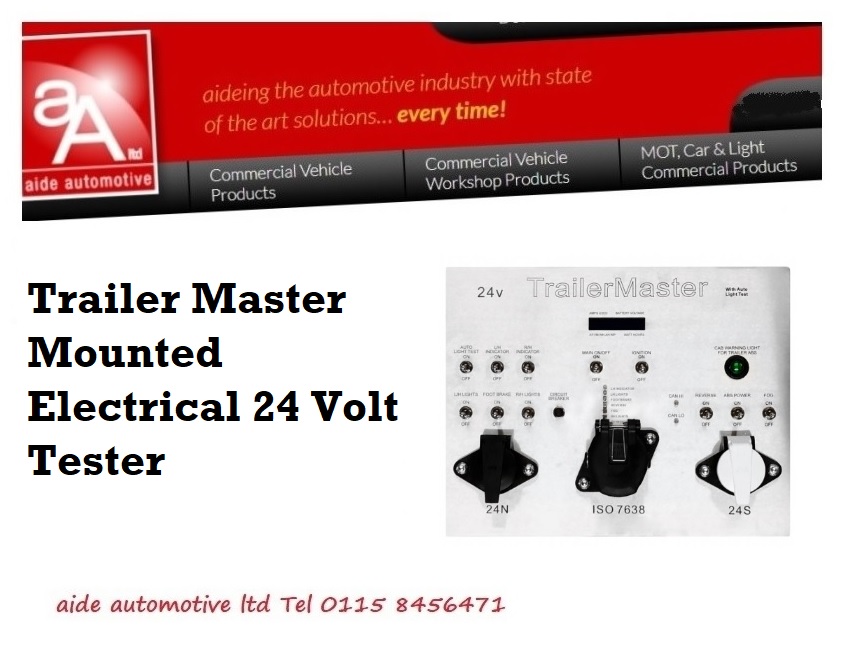
Our product range – Trailer / Caravan Light / Brake Tester – HGV Brake Testers – Trailer EBS Testers – HGV Truck Trailer EBS / ABS Sensor Tester – Truck /Trailer Diagnostic Tools – Midtronics Battery Testers – Anti Siphon Devices – ISOCheck – Trailer Locks – Auto Braking Reversing System – HGV Diesel Tank Alarms – HGV Siphon – Misfuelling Diesel Head – Truck Susie Coil Covers – #MOT #Calibration – 12 Volt Trailer / Caravan Light / Brake Tester– Plus More